Build a Notion Financial Tracker That Works for You
A Notion financial tracker is basically your own personal finance hub, built right inside the Notion app. Think of it as a way to manage your income, track every expense, and watch your savings grow, all in one place. It’s a huge upgrade from juggling separate spreadsheets and budgeting apps, giving you a crystal-clear, all-in-one interactive dashboard of your financial health.
This guide will show you exactly how to build one from the ground up.
Why Your Finances Deserve a Real System

If you've ever tried to manage your money with a patchwork of spreadsheets, banking apps, and random budgeting tools, you know the headache. Nothing talks to each other, and getting a simple, complete picture of where your money is going feels almost impossible. This is where a Notion financial tracker completely changes the game.
Instead of just plugging numbers into boring, static cells, you’re building an interactive command center for your money. Honestly, it transforms money management from a dreaded chore into a genuinely insightful process. You stop just tracking money and start understanding your financial habits.
Moving Beyond Static Spreadsheets
The real magic of using Notion for your finances is how dynamic and interconnected everything can be. A traditional spreadsheet is like a lonely island of data, but Notion lets you build a whole ecosystem where your income, expenses, and goals are all linked together.
This shift isn't happening in a vacuum. Notion's user base exploded to over 20 million people worldwide by early 2025, showing a massive appetite for better organizational tools. This trend is mirrored in personal finance, where a whopping 68% of millennials now use digital apps to track their budgets. You can even check out some inspiration over at Notion's official template gallery to see what's possible.
If you're still on the fence, here’s a quick comparison that really highlights why making the switch from old-school spreadsheets is such a no-brainer.
Notion Trackers vs Traditional Spreadsheets
| Feature | Traditional Spreadsheet | Notion Financial Tracker |
|---|---|---|
| Data Visualization | Basic charts, manually created | Interactive charts, galleries, and boards |
| Customization | Limited to cells, rows, and columns | Fully customizable layouts and views |
| Integration | Manual data entry from other sources | Embeds live data, links to other pages |
| Accessibility | Clunky on mobile devices | Seamless experience on desktop and mobile |
| Collaboration | Difficult to share and track changes | Easy sharing and real-time collaboration |
As you can see, Notion offers a far more robust and flexible system for anyone serious about getting their finances in order.
A Notion financial tracker is more than a record-keeper; it’s a decision-making tool. It provides the clarity needed to identify spending patterns, spot savings opportunities, and confidently plan for your future goals.
Ultimately, the goal of this guide is to give you a clear, actionable path to creating a system that not only works for you today but can also adapt and grow as your financial journey evolves. We're going to build a solid foundation you can truly rely on.
Building Your Core Financial Databases
A great financial tracker in Notion isn't about flashy widgets or crazy formulas. At its core, it's all about a clean, simple, and interconnected data structure. We're going to start by building the three databases that will be the engine for your entire system: Income, Expenses, and Accounts.
Think of these less like separate spreadsheets and more like building blocks that will eventually talk to each other. If you get this foundation right, everything else—from building visual dashboards to tracking your net worth—becomes so much easier. We'll focus on setting up the right properties from the get-go to make sure your data is organized and ready to work for you.
Creating the Three Essential Databases
First things first, let's create three new full-page databases inside your Notion workspace. The quickest way is to just type /table on a new line and choose "Table view - New database."
Give them these exact names:
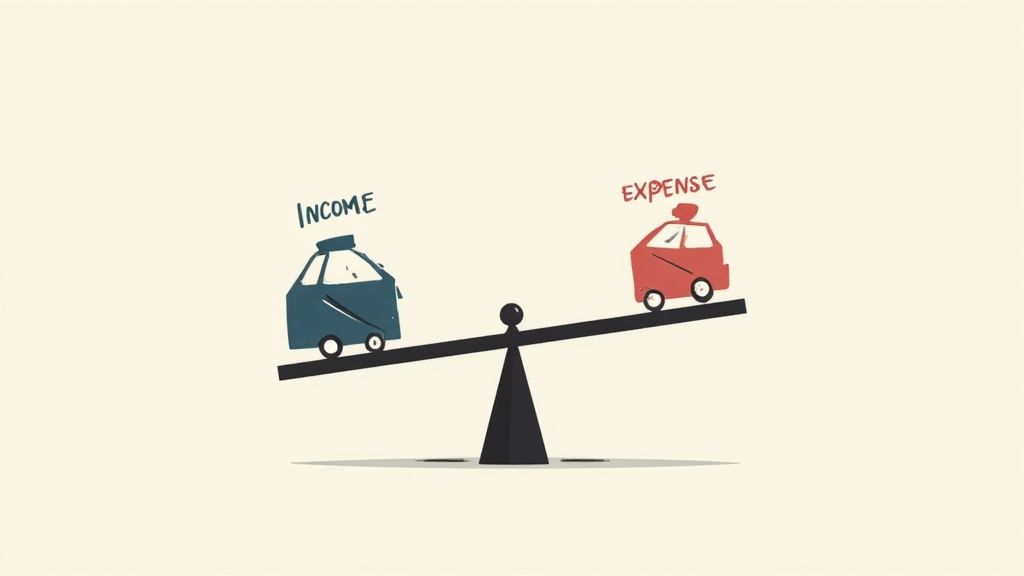
- Income: This is for every single dollar that comes in. Your paycheck, a freelance gig, that birthday money from your aunt—it all goes here.
- Expenses: This will be your daily driver for tracking everything you spend, from your morning coffee to your monthly rent.
- Accounts: This database is simply a list of where your money lives—think checking accounts, savings, credit cards, you name it.
With these containers in place, we can now start customizing them with properties to bring them to life.
For a little context, this flowchart breaks down the basic loop: you set up a database, you fill it with your transactions, and Notion does the heavy lifting of calculating your financial picture.
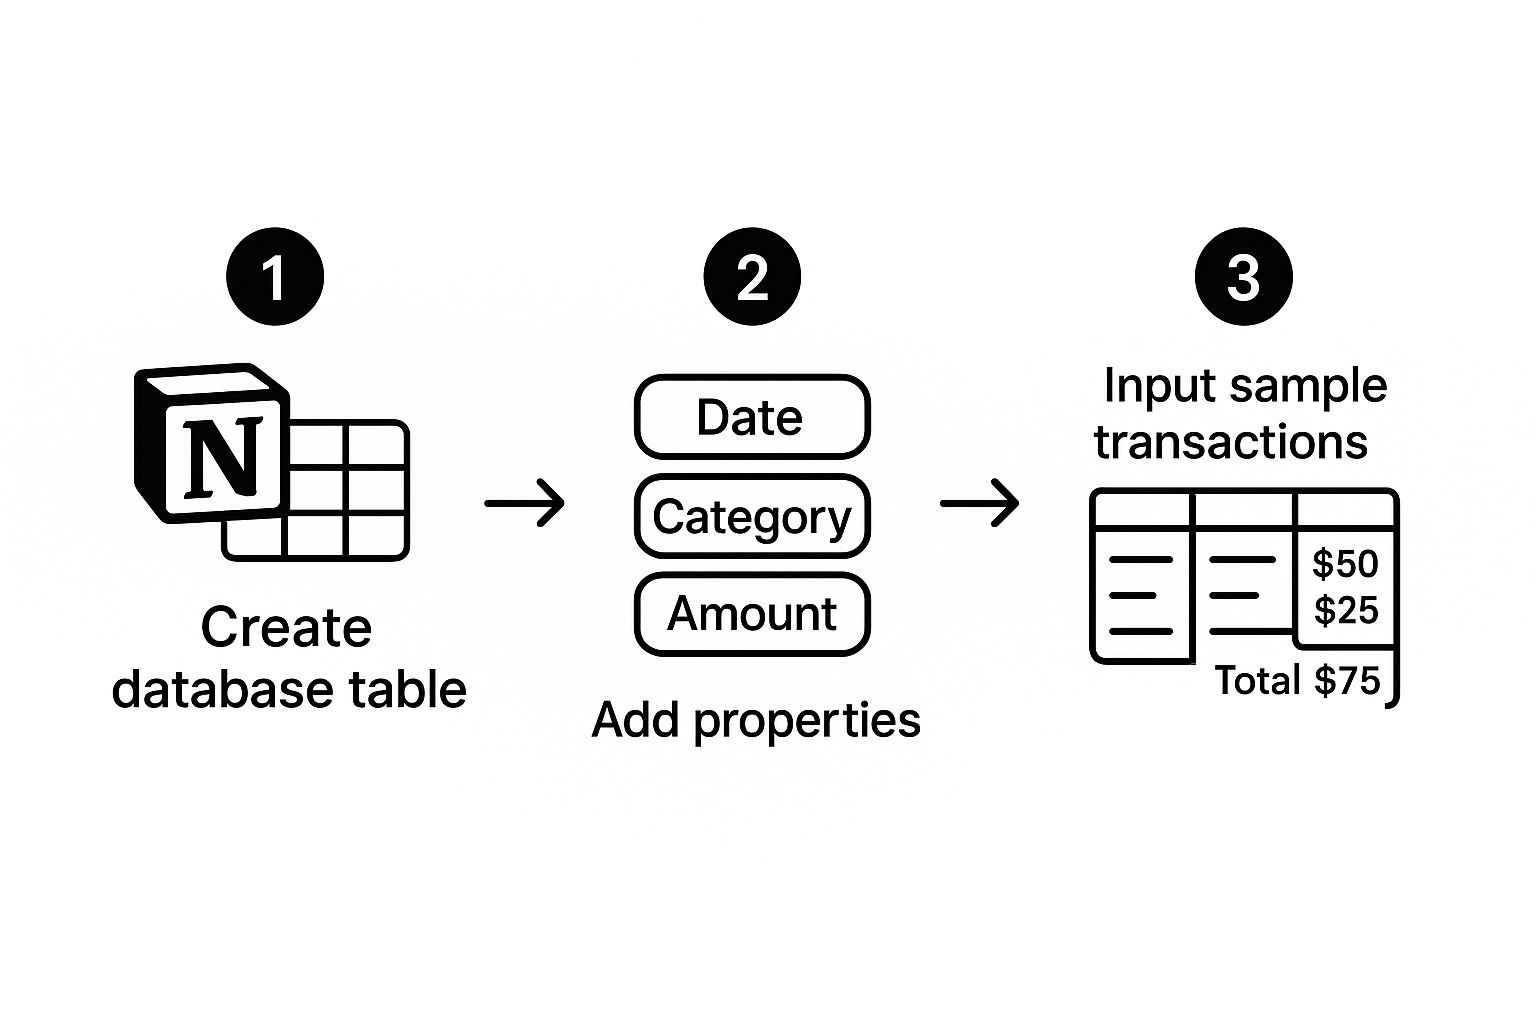
As you can see, the real power comes from consistently logging your transactions. That's what allows Notion to automatically give you that real-time financial snapshot we're all after.
Setting Up Your Database Properties
Let’s dive into configuring the properties, starting with your Expenses database, since it’s usually the most active one. The properties for your Income database will be almost identical, so you can just repeat the process.
- Amount: The default "Name" property isn't what we want. Change this to a "Number" property and set the format to your currency. This is absolutely critical for doing any kind of math later on.
- Date: Use the "Date" property. You’ll need this for everything from sorting your transactions to building monthly summary views.
- Category: I recommend the "Select" property for this. Here, you'll create your spending categories like 'Groceries,' 'Rent,' 'Transport,' and 'Entertainment.' The key is to be consistent with your categories—it’s how you’ll actually understand where your money is going. If you're a business owner, knowing how to track business expenses with clear categories is a lifesaver for budgeting and tax time.
- Status: A simple "Checkbox" property named 'Cleared' works perfectly here. It’s a great way to check off transactions as they officially clear your bank account.
The real power of a Notion financial tracker emerges when you connect your databases. This is what separates a dynamic system from a simple list of numbers.
Linking Your Databases with Relations
Okay, this is where the magic really starts. We’re going to connect your Expenses database to your Accounts database. This one move allows you to see exactly which account paid for every single purchase.
Head over to your Expenses database, add a new property, and choose the "Relation" type. A little menu will pop up asking you which database to connect to—just search for and select your "Accounts" database.
That's it. Now, every time you log a new expense, you can choose whether it came from your 'Checking Account' or was charged to your 'Visa Credit Card'. This single connection is what turns your separate lists into a powerful, interconnected ecosystem, giving you a crystal-clear view of how your money flows.
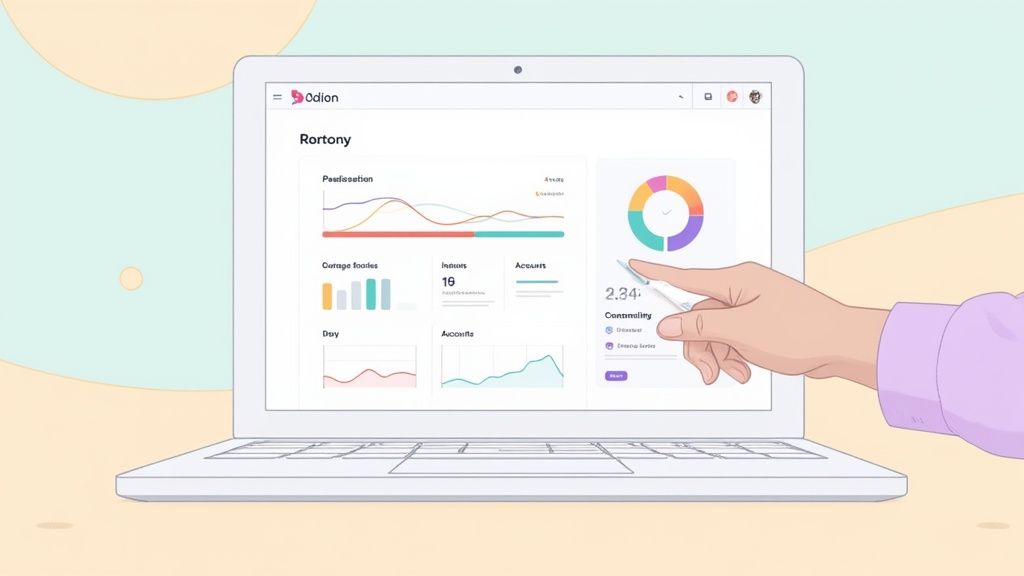
Designing Your Visual Finance Dashboard
A database full of numbers is useful, but let's be honest, it's not very inspiring. The real magic happens when you turn that raw data into at-a-glance insights. This is where we stop looking at tables and start building a financial command center that you can understand in a single glance.
To do this, we'll need to bring in some outside help. Services like Widgetly are perfect for this. They let you create dynamic, embeddable charts and progress bars that breathe life into your Notion page. Instead of just seeing a list of expenses, you'll be able to see exactly where your money is going.
Think about it: you open your tracker and immediately see a net worth chart trending upwards or a monthly budget bar showing you exactly how much wiggle room you have left. This is the kind of instant feedback that really helps you stick to your goals.
Creating Your First Financial Widget
Let's start with something simple but powerful: a "Monthly Budget" progress bar using Widgetly. Once you learn the ropes with this one, you'll be able to create all sorts of other visuals.
First, you’ll need a free account on Widgetly. After signing in, find their widget library and select the "Progress Bar" option. This is where the fun starts—you can tweak everything to fit your tracker perfectly.
You'll see a few settings to configure:
- Title: Keep it simple and clear. Something like "July Spending" or "Monthly Groceries Budget" works great.
- Current Value: This is where you'll plug in the amount you’ve spent so far. You’ll grab this number from your Notion database and update it here.
- Target Value: This is your total budget for the month or category. For instance, $500 for groceries.
- Appearance: Play around with the colors, style, and size to make it match the vibe of your Notion page.
When it looks just right, Widgetly will give you an embeddable link. Go ahead and copy it.
Embedding Widgets into Notion
Getting your new widget into Notion couldn't be easier. Just head back to your financial tracker page, find a good spot for it, and paste the link you just copied.
Notion will pop up a little menu with a few options. All you have to do is choose "Create embed," and voilà—your progress bar will appear right on the page. You can drag the corners to resize it or move it around until your dashboard layout feels just right.
The goal here is to build a dashboard that tells a story at a glance. Your widgets should immediately answer your most important questions: "Am I overspending this month?" "How close am I to my savings goal?" "Is my net worth actually growing?"
Once you get the hang of it, you can build out a whole suite of visuals. A pie chart is fantastic for seeing your spending breakdown by category, and a line chart is perfect for tracking your savings balance over time. If you want more ideas, checking out some best practices for data visualization can help you design a clearer, more impactful dashboard. This is how you turn a simple tracker into a tool you’ll actually want to use.
Bringing Your Numbers to Life with Formulas and Rollups
Okay, so you've built the foundation: clean databases and a dashboard that looks great. This is where the magic really happens. We're about to turn your tracker from a simple data log into an intelligent system that does the heavy lifting for you. By using Formulas and Rollups, we can automate calculations and spot trends you’d otherwise have to dig for.
This is the leap from just recording your spending to creating a system that actively analyzes it. Forget manually adding up your expenses at the end of the month; we're going to teach Notion to do it automatically.
Creating a Monthly Summary with Rollups
Let's start with a really practical feature: a "Monthly Summary" database. This will give you a high-level view of your finances each month, showing you exactly what came in and what went out without touching a calculator.
First, go ahead and create a new database. Call it "Monthly Summary." Inside, make an entry for each month, like "July 2024," "August 2024," and so on.
The real power kicks in when we connect this new database to the ones we already have.
- Link Your Income: Add a new property, select "Relation," and link it to your Income database.
- Link Your Expenses: Do the same thing again, but this time, create a "Relation" property that connects to your Expenses database.
Now, whenever you add a new transaction—whether it's income or an expense—you'll link it to the correct month in your "Monthly Summary." I know, it sounds like a bit of extra work at first, but this one simple step is what makes all the automation possible.
With the relationships established, it's time to create a Rollup. Add a new property to your "Monthly Summary" database and choose "Rollup." For the configuration, tell it to look at your Expenses database, grab the "Amount" property, and use "Sum" for the calculation. You can name this rollup "Total Expenses." Just repeat the same process for your income, and bam—you've got a fully automated monthly financial report.
This is the heart of a great financial tracker. By linking your databases, every single transaction you log automatically updates your monthly totals and any other report you build. It's a "set it and forget it" system.
This kind of detailed, automated tracking is what gets people hooked. It’s no surprise that the average active user engagement on financial templates can be as high as 45 minutes per session. When your data is this clear, you actually want to dive in and see what it's telling you. If you're curious about how people use historical data to spot trends, you can read more about financial data templates on Notion.com.
Calculating Budgets with Simple Formulas
Rollups are fantastic for pulling in totals from other databases, but Formulas are what you'll use for calculations inside a single database. A classic example is adding a "Remaining Budget" column to a budget tracker.
Let's say you have a simple database just for tracking your monthly category budgets (Groceries, Transport, etc.). It would probably have a few properties like these:
- Category Name (Title)
- Budgeted Amount (Number)
- Actual Spent (This would be a Rollup from your Expenses database, summing all expenses linked to that category)
To see how much you have left to spend, just add a "Formula" property. The formula itself is super straightforward: prop("Budgeted Amount") - prop("Actual Spent").
Now, as you log your expenses and tag them with the right category, the "Actual Spent" rollup automatically updates, and your "Remaining" formula shows you exactly what's left in real time. This gives you immediate, actionable feedback on your spending without ever having to open a calculator. That instant clarity is what makes a custom Notion tracker so incredibly useful.
Keeping Your Financial System Running Smoothly

Let's be real: a beautifully designed Notion tracker is useless if you don't keep it updated. The secret to making it work long-term isn't about mastering complex formulas; it's all about consistency. You need a system that’s so simple to manage it just becomes part of your day, not another chore on your to-do list.
The best way I've found to do this is by building a small, sustainable habit. Forget about letting expenses pile up until the end of the week. Just set aside five minutes every morning to log the previous day’s transactions. It’s a simple routine that prevents you from feeling overwhelmed and keeps your financial snapshot accurate at all times.
Let Notion Do the Heavy Lifting
Notion has some great built-in features that can cut down on your manual work. For a finance tracker, the recurring template feature is a game-changer. Instead of having to duplicate your monthly budget page on the first of every month, you can just set it and forget it.
All you have to do is create a template for your monthly summary and tell Notion to repeat it automatically. You can set it to generate a fresh page for you on the first of the month, every month. That way, your new dashboard is pre-formatted and waiting for you right when you need it.
Connect to Outside Tools for True Automation
If you want a more hands-off system, you can connect your Notion workspace to automation platforms like Zapier or Make. Think of these tools as bridges that link your bank, your email, and your Notion tracker.
Here’s a practical example of what that looks like:
- You buy something online and get an email receipt.
- An automation rule you’ve set up sees the receipt and pulls the key info.
- It then automatically creates a new expense in your Notion database with the right date, vendor, and amount.
This kind of setup practically eliminates manual data entry, which is honestly the biggest reason most people abandon their trackers. Learning how to automate repetitive tasks can save you a ton of time and get your system running almost on its own.
The real goal here is to spend less time logging your finances and more time analyzing them. Automation takes care of the tedious stuff so you can focus on making smarter decisions with your money.
By bringing these kinds of systems into their workflow, many small businesses are now automating their routine financial tasks. This has freed up an average of 5 hours per week for more important work. They’ve also seen expense tracking accuracy jump by up to 25% and late payments drop by 20%, all because they have a clearer view of their numbers. You can discover more insights about these finance trackers on Notion.com.
When you combine a simple daily habit with smart automation, you create a financial system that actually works for you, ensuring your Notion tracker stays a valuable tool for the long haul.
Common Questions About Notion Financial Trackers
https://www.youtube.com/embed/GV6-U1X4hJM
Diving into any new system is bound to bring up a few questions. Building your own financial tracker in Notion is a game-changer, but it's totally normal to hit a snag or just wonder if you're doing it right.
I've put together answers to some of the most common questions I hear. My goal is to give you clear, quick solutions so you can get back to building with confidence, whether you're wrestling with a database or thinking about security.
Can I Just Use a Pre-made Template Instead?
Absolutely! Grabbing a pre-made template is a fantastic way to get started. You can go from zero to a fully functional dashboard in minutes, and there are some incredibly well-designed templates out there.
But here’s the thing: when you build it yourself, you understand how it all connects. You learn exactly why that relation works or how that rollup calculates your savings rate. This knowledge is gold. It means you can fix things when they break and, more importantly, adapt the system as your financial life evolves.
Think of it like this: a template is a pre-built car. This guide teaches you how to be the mechanic. Once you know how the engine works, you can build your own hot rod or supercharge any template you find.
So yes, start with a template if you want, but understanding the mechanics is what gives you true control.
How Secure Is My Financial Data in Notion?
This is probably the most important question, and it's smart to ask. Notion does its part by using industry-standard encryption for your data, both when it's being sent and when it's stored on their servers.
That said, the weakest link in any security chain is usually human error. The best way to keep your financial info safe is to practice good digital security yourself.
Here are the non-negotiables:
- Use a strong, unique password. Don't reuse the password from your email or social media.
- Turn on two-factor authentication (2FA). This is a simple step that adds a massive layer of protection.
- Be careful with sharing. Never make your financial pages public or share them with anyone you don't trust implicitly.
For extra peace of mind, you can also avoid putting highly sensitive information in your tracker. For instance, instead of full account numbers, just use nicknames like ‘Chase Checking’ or ‘Amex Gold.’ You get all the functionality without exposing critical details.
How Can I Track Investments Like Stocks or Crypto?
Tracking investments takes a slightly different setup, but it’s definitely possible. The best way I've found is to create a dedicated Investments database.
In this database, you'll want to create properties for things like ‘Asset’ (e.g., Bitcoin, AAPL), ‘Quantity,’ ‘Purchase Price,’ and ‘Current Price.’ Now, Notion can't pull live market data automatically, so you'll have to pop in and update the ‘Current Price’ property yourself every so often.
Once you have that data, a couple of simple formulas do all the heavy lifting. One can calculate the current value (prop("Quantity") * prop("Current Price")), and another can figure out your gain or loss. Then, back on your main dashboard, you can use a Rollup to pull the total value of your portfolio into your net worth summary. It's a clean and effective way to see the big picture.